Spectrum (Datacolor)
Introduce
:
Datacolor MATCH is a powerful quality control system that
defines the standard for
color control software.
System Requirements :
Driver Installation :
1.
Place the USB Drivers and Documentation
CD into the CD-Rom drive.
2.
Connect
the USB cable to both the instrument and the computer. The window
below will automatically display:

3. The New
Hardware Wizard window displays.

4.
After complete
the installation press Finish button.
Viewing/Changing System Port Assignment:
Some Datacolor programs
automatically configure the USB port assignment. Others
require that you manually assign the port number.
How
to change:
1.
Go to start
mane, setting> control panel .
2.
double-click on System
Than the
screen will come(My computer properties)

3.Click the Hardware Tab. The dialog box below displays

4.
Click the Device Manager button.
The Device Manager window displays.

5. Go to the Ports heading. Click on the plus (+) to display the port selections.
6.
Click USB Serial Port. The USB Serial
Port (COM3) Properties.
7.
Click
Port Settings.
8.
Click the Advanced button.
9.
Click on the port assignment to be used
for the USB port.
10.
Select the port and when you have
completed the changes, click OK.
Datacolor Match textile V1.2
Installation and upgrade Guide
You must have Administrator
Rights to install this software and you must have installed Sybase first!
To install your software, do the
following:
1.
Start
Windows.
2 .
Place
the product CD into the CD drive.
3.
The
main installation menu should appear automatically.
Ø If you do not
see the menu window, do the following:
Click the Start button
From the start menu, choose Run…
in the Run dialog box, type D:
MENU and click OK. (If your CD Drive is a letter other than D, use that
letter in the
dialog box.)

1.
When the Main Installation Menu is
displayed, choose “Install Datacolor Match Textile 1.2.”
2.
Select a language from the list box.

Ø The
next dialogs only appear if pre Spectrum software is already installed on the
system. If it’s a new
installation the Setup
proceeds with the Welcome dialog.
Ø When you upgrade
from DCIMatch1.x to Datacolor MATCH TEXTILE v1.2, the Setup uninstalls
the old
software before the new Software is installed
Ø The Setup asks
you twice if you have made a backup of your databases. If not, click ‘No’ to
exit
the setup.


Ø Depending on the
installed software you are informed about the un-installation process. The
Setup
\ program shows a message for each program that should be installed.
I.
Uninstalling
DCIMatch
II.
Uninstalling
CenterSideQC (if installed)
III.
Uninstalling
Fibramix (if installed)
IV.
Uninstalling
SmartSort (if installed)
3.
The
setup continues with the Welcome dialog.

N.B:- If you are
installing Datacolor MATCH TEXTILE for the first time, click “Next” to
access the Datacolor Software License Agreement dialog. You must select the
acceptance radio button in order to install Datacolor MATCH TEXTILE. If you are
upgrading an existing, licensed copy of Datacolor Match, this screen will not
appear.
4.
Select the acceptance radio button and
click the “Next” button to proceed.


5. Than click on finish.
Database update
1. If
this Windows Security Alert appears, click the ‘Unblock’ button.

2.
Followed by a database update.

Ø If you get an
error message ‘Unable to open log file’ click the OK button to execute the
database update.The error has no negative effect. Click the ‘Finish’ button at
the end of the database update.

Ø Followed
by installing the Acrobat Reader

3.
Finally, the “Complete” screen display.

4.
Click “Finish”

Upgrading DCIMatch 1.x or Datacolor
Match TEXTILE 1.0
N.B:- You must upgrade the workstations with Sybase 9 before installing the
application software.
Systems
running still with Sybase 6.x (DCIMatch 1.0) cannot be upgraded. The Setup
program exits in that case. Please contact Datacolor.
Existing Software
|
Sybase version
|
Comment
|
DCIMatch 1.0
|
Sybase 6.x
|
No direct upgrading
possible.
Please contact Datacolor
|
DCIMatch 1.1
|
Sybase 7.x
|
Direct upgrade possible
|
DCIMatch 1.2
|
Sybase 7.x
|
Direct upgrade possible
|
DCIMatch 1.3x
|
Sybase 7.x
|
Direct upgrade possible
|
DCIMatch 1.4,
SmartSort 1.x,
CenterSideQC 1.x,
Fibramix 1.x
matchExpress 1,x
|
Sybase 7.x
|
Direct upgrade possible
|
Datacolor MATCH
TEXTILE
1.0.x
|
Sybase 7.x
|
Direct upgrade possible
|
To be able to install Sybase 9 it
is absolutely necessary that all Datacolor database scripts are
executed with Sybase 7.
Upgrade datacolor:
1.
Make
a backup of your databases
2.
Run
the Sybase CD Setup
a. Setup checks the
Sybase version
b. Setup updates the
database tables
c. Sybase 9 is installed
d. Install all Datacolor
applications you have received
If it is a network
system, upgrade all workstations.
3.
On
a Stand-alone system run the task Upgrade / Rebuild Database to recreate
the database with the schema of Sybase 9.
a.
Make
a Backup of the new database.
Ø NOTE: Old
backups created before the upgrade to Datacolor MATCH TEXTILE 1.2 cannot be
used.
4.
For
networked systems only:
Install the Sybase® 9 Server on a
networked system with a database server. Don’t
forget to modify the executable
of the Sybase database service, if the Server was

ü Select the
server engine from C:\Program Files\Sybase\sql anywhere
9\win32\dbsrv9.exe
(default
installation path).
a.
Run
the task Upgrade / Rebuild Database to recreate the database with the schema
of Sybase 9.
b. Make
a Backup of the new database.
Creating a Sybase Service
1. Start the Program
Sybase Central from the Program Group Sybase SQL Anywhere 9

2.
If
the program runs, click on the page Services and open the context menu New,
Service… to create the database service. Follow the instructions of the
setup program The next Screen is a Create a New Service screen – type a name
for the service and proceed with “Next”.

3.
Name
the service, e.g. DCMatchDCProcess and select how the service should be
started. The next dialog of the installation wizard asks you to select the type
for the Adaptive Server Anywhere service. Select Network Database Server to
create the service and click “Next


4. Fill in the parameters for the new service now.

Parameter Settings in the example:
-c 128MB -c Cash size set to 128 MB
-ct- -ct- character translation
switched off
-n
DCMatchDCProcess -n
Service name
C:\database\dci_itm.db
c:\database\printform.db All
database to open
–x tcpip
N.B: -c Cash size set to 128 MB
-ct- character translation switched off
-n Service name All database to open
-x tcpip Network proto
Switch and Description
-c size
:
Set initial cache
size.
The amount of memory
available for use as a database server cache is one of
the key factors
controlling performance. You can set the initial amount of cache
memory using the -c
command-line option
The more cache memory
that can be given the server, the better will be its
performance.
The units K and
M can be either lower case or upper case. If K or M is not
supplied, any integer
less than 10000 is assumed to be in kilobytes, and any
integer 10000 or
greater is assumed to be in bytes. For example, -c 4096 means
4096KB or 4 194 304
bytes. Whereas, -c 200 000 means (an unreasonably
small) cache of 200
000 bytes.
-ct[-
or +] :
Perform client-engine
or server character translation
By default, character
set translation is turned on. Character set translation
converts strings
between character sets that represent the same characters, but
at different values.
This is useful when the client machine and the database use
different character
sets. Character set translation is disabled with the -ct- server
option. If this
argument is supplied as -ct+, character set translation is turned on.
In version 7.x and
earlier of Adaptive Server Anywhere, the + or - values are not
accepted: specifying
the -ct option enabled character set translation.
-n name
:
Use name as the name
of the database server.
-x list :
Comma-separated list
of communication links to try.
-ti minutes :
Client idle time
before shutdown—default 240 minutes [network server].
Disconnect
connections that have not submitted a request for minutes. The default is 240
(4 hours). A client
machine in the middle of a database transaction holds locks until the
transaction is ended
or the connection is terminated. The -ti option is provided to
disconnect inactive
connections, freeing their locks.
The -ti option does
not disconnect clients that use the shared memory communications
link.
Setting the value to
zero disables checking of inactive connections, so that no connections are
disconnected.
-tl seconds :
Default liveness timeout for clients in
seconds—default 120 seconds.
5.
Accept the default settings on the
‘Choose Account’ ‘and Choose Option’ dialog box.

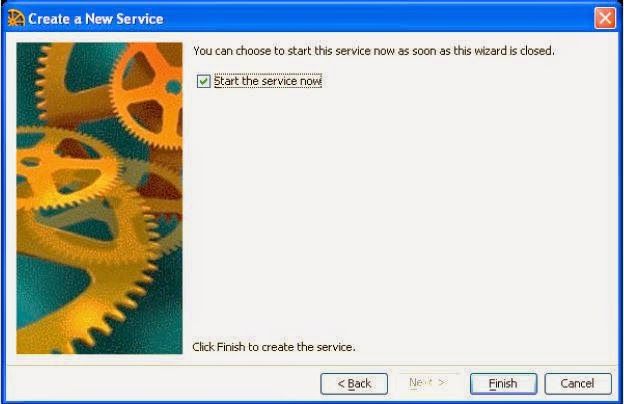
Click Finish.

After completing the installation the screen will be
come.
How to change an existing Sybase 7
service to run with Sybase 9
1.
Don’t
forget to modify your Sybase database service that it uses the Sybase 9 server
engine. This can be done with Sybase Central. Right click the Service
and click on ‘Stop’ than Select ‘Properties’.

2. Select
‘Properties’

3.
Select
the server engine from C:\Program Files\Sybase\sql anywhere 9\win32\dbsrv9.exe
(default installation path) and click on ‘OK’. Don’t forget the start the
service again.
ODBC Data Source
Administrator

2.
Three
data sources are created as System DSNs during installation – dci_alab,
dci_itm and printform.
These data sources are local to a computer,
rather than dedicated to a user. The system, or any user having
privileges, can
use a data source set up with a system DSN. Select dci_itm and click the
button Configure

3.
The
Data source name must be dci_itm Microsoft
applications and Delphi applications must be checked
Other
settings are default There is
no need to define a login.


Validating Datacolor Software
Datacolor Spectrum Software is protected from
unauthorized use by a software license. When the software is initially installed,
the software license is in a demo period that will allow access for a fixed
amount of time. In order to run the software after the demo period, the
software license must be validated. There are a number of ways to validate the software.
In general you will need the following information:
1.You will need the Serial
Number for your software. This number is supplied by Datacolor and is found on the CD case.
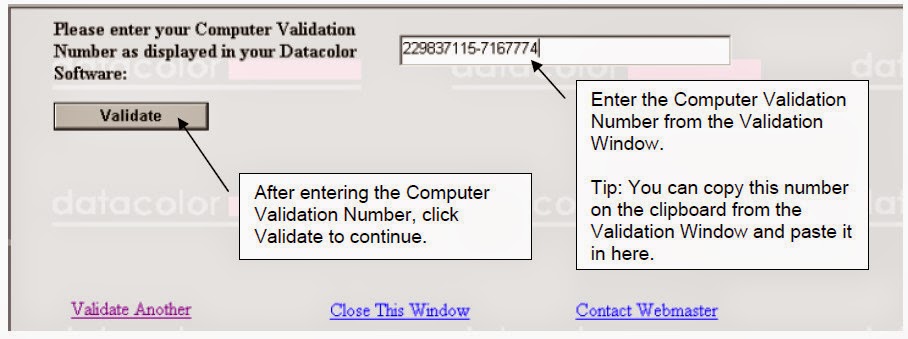
2. You will need a Computer
Validation Number. This number is generated by the security software and is
unique to your computer.
Datacolor Tools will display the
Validation Window every time it starts during the demo period. The Validation
Window
can be accessed from “About” window in Datacolor
Tools, select “License Info”.
You can validate the software in 3 ways:
• Using a Web Connection – Link is on the Validation
Window. Example is shown below
•E-Mail – Send Serial
Number and Computer Validation Number for the product to SoftwareLicense@Datacolor.Com.
You will receive an Unlock Response Number by e-mail that you will put into the
Validation Window.


After you have entered the Unlock
Response Number into the Validation Screen, your software is validated. You can
validate additional programs by selecting the Validate Another option.
No comments:
Post a Comment